,=====================.
|G GATEWAY2000 /P5-90/|
|.-------------------.|
||[ _ o . . _ ]_||
|`-------------------'|
|| ||
|`-------------------'| _ _ _____
|| || | | | | / ___|
|`-------------------'| | |_| | ___ _ __ ___ ___\ `--. ___ _ ____ _____ _ __
|| || | _ |/ _ \| '_ ` _ \ / _ \`--. \/ _ \ '__\ \ / / _ \ '__|
|`-----------------_-'| | | | | (_) | | | | | | __/\__/ / __/ | \ V / __/ |
||[=========]| o (@) | \_| |_/\___/|_| |_| |_|\___\____/ \___|_| \_/ \___|_|
|`---------=='/u\ --- |
|------_--------------| _____ _ _
| (/) (_) []| | __ \ (_) | |
|---==--==----------==| | | \/_ _ _ __| | ___
||||||||||||||||||||||| | | __| | | | |/ _` |/ _ \
||||||||||||||||||||||| | |_\ \ |_| | | |_| | __/
||||||||||||||||||||||| \____/\__,_|_|\__,_|\___|
|||||||||||||||||||||||
|||||||||||||||||||||||
|||||||||||||||||||||||
|||||||||||||||||dxm|||
|||||||||||||||||||||||
|=====================|
.' `.
"""""""""""""""""""""""""""
--------------------- Home Server Guide ---------------------
[1] Choosing the parts for your server.
[2] Installing the operating system and configuring.
[3] Installing and configuring the first applications.
[4] Exposing the server to the internet.
[5] Some applications to install.
Hello, in this guide/article, I'm going to cover the steps needed to set up and configure your own home server,
including tips on choosing hardware, installing the operating system, configuring applications and exposing the server to the Internet.
[1] Choosing the parts for your server.
Setting up a home server can be done in various ways, depending on what you have at your disposal. You can choose to reuse old parts or old computers, or invest in new parts.
In my case, I used two old computers, combining them into one. Although it's not the ideal solution, it works well for my purposes.
If you're looking for a more professional solution or don't have old hardware to reuse, the best option is to buy. I recommend looking on sites like AliExpress or buying used parts.
On AliExpress, you can find Xeon kits, which offer good quality processors at a cheap price. You don't need a dedicated GPU; an integrated video card is sufficient (in most cases).
The main focus of the server is the CPU; a basic processor is sufficient. Now, about RAM, it's important for server performance.
I recommend 8GB, or at least 4GB. On my server, I use 8GB DDR3.
As for storage, the choice depends on what you intend to do with the server. If you plan to host files or set up a NAS, an SSD is essential.
However, for hosting websites, etc., a 500GB hard drive is sufficient.
[2] Installing the operating system and configuring.
In this guide, we will use Debian 12 netinstall as the operating system (Download ISO), as it is lightweight, secure and stable. However, the choice of operating system may vary according to your preferences.
For self-hosting beginners, I recommend using Debian. Otherwise, other options such as Ubuntu Server or Fedora can be considered. For a NAS, TrueNAS is highly recommended.
The operating system does not need and should not have a graphical interface, as it will only be accessed via SSH. During installation, be sure to check the option to install an SSH server.
Once the installation is complete, you can access the system as follows:
ssh user@server_ip
Replace "user" with the username you created during installation or use "root". Then enter the user's password and you'll be connected to your server.
When you log in, the first step is to access as the root user and update the packages:
su root
apt update && apt upgrade
With the packages updated, the next step is to install sudo and add your user to the sudo group:
apt install sudo
/usr/sbin/usermod -aG sudo <\your_user>
Then log out and log back into SSH to apply the changes.
Now for some SSH configuration tips. By default, it's a bit insecure. The SSH configuration file can be found in "/etc/ssh/sshd_config".
When accessing it, the settings I recommend are changing the default port (22) and disabling root login:
Port 2222
PermitRootLogin no
After making these changes, restart the SSH service to apply the settings:
systemctl restart sshd
This way your SSH is already a little more secure, nothing much, but enough.
Another important setting is to add automatic updates for security packages. To do this, we can use unattended-upgrades:
1. Install unattended-upgrades, apt-listchanges and apticron:
sudo apt install unattended-upgrades apt-listchanges apticron
2. Create the file "/etc/apt/apt.conf.d/51myunattended-upgrades" and add the following content:
// Enable the update/upgrade script (0=disable)
APT::Periodic::Enable "1";
// Do "apt-get update" automatically every n-days (0=disable)
APT::Periodic::Update-Package-Lists "1";
// Do "apt-get upgrade --download-only" every n-days (0=disable)
APT::Periodic::Download-Upgradeable-Packages "1";
// Do "apt-get autoclean" every n-days (0=disable)
APT::Periodic::AutocleanInterval "7";
// Send report mail to root
// 0: no report (or null string)
// 1: progress report (actually any string)
// 2: + command outputs (remove -qq, remove 2>/dev/null, add -d)
// 3: + trace on APT::Periodic::Verbose "2";
APT::Periodic::Unattended-Upgrade "1";
// Automatically upgrade packages from these
Unattended-Upgrade::Origins-Pattern {
"o=Debian,a=stable";
"o=Debian,a=stable-updates";
"origin=Debian,codename=${distro_codename},label=Debian-Security";
};
// You can specify your own packages to NOT automatically upgrade here
Unattended-Upgrade::Package-Blacklist {
};
Unattended-Upgrade::AutoFixInterruptedDpkg "true";
// Perform the upgrade when the machine is running because we won't be shutting our server down often
Unattended-Upgrade::InstallOnShutdown "false";
// Send an email to this address with information about the packages upgraded.
Unattended-Upgrade::Mail "root";
// Always send an e-mail
Unattended-Upgrade::MailOnlyOnError "false";
// Remove all unused dependencies after the upgrade has finished
Unattended-Upgrade::Remove-Unused-Dependencies "true";
// Remove any new unused dependencies after the upgrade has finished
Unattended-Upgrade::Remove-New-Unused-Dependencies "true";
// Automatically reboot WITHOUT CONFIRMATION if the file /var/run/reboot-required is found after the upgrade.
Unattended-Upgrade::Automatic-Reboot "true";
// Automatically reboot even if users are logged in.
Unattended-Upgrade::Automatic-Reboot-WithUsers "true";
3. Run the unattended-upgrade in test mode to make sure everything is correct:
sudo unattended-upgrades --dry-run --debug
4. If all is well, enable unattended-upgrade and restart the server:
sudo systemctl enable --now unattended-upgrades
sudo reboot
If everything is set up correctly, you're ready to continue configuring your server.
[3] Installing and configuring the first applications.
In this paper, we're going to use Docker and Docker Compose to install and configure our applications, which is highly recommended.
If you don't have any experience with Docker, it's time to study up a bit. Let's start by installing Docker:
sudo apt install docker.io docker-compose
I like to organize my applications in folders in my home and use these folders as volumes in Docker.
You can organize them any way you like, but I'll show you how I usually do it:
.
├── app1
│ ├── docker-compose.yml
│ └── app1_data
├── app2
│ ├── app2_data
│ └── docker-compose.yml
└── app3
├── docker-compose.yml
└── app3_data
Another tip is to use web ports in the 800x range (e.g. 8001, 8002, 8003, etc.) to keep things organized.
Now, let's host our first application. Let's start with a web server using Apache2.
First, create a "www" folder in your home and place a docker-compose.yml file inside it:
.
└── www
└── docker-compose.yml
Within the docker-compose.yml file, you can define the Apache2 service as follows:
version: '3'
services:
apache:
image: httpd:latest
volumes:
- /home/<your_username>/www:/usr/local/apache2/htdocs
- /home/<your_username>/www/httpd.conf:/usr/local/apache2/conf/httpd.conf
ports:
- 8001:8001
restart: unless-stopped
In the volume, change the path to the folder where you want to store your site's files, replacing "<your_username>" with your user.
In ports, you can add more as needed.
ports:
- 8001:8001
- 8002:8002
- 8003:8003
Now start the Apache2 container:
sudo docker-compose up -d
You will see some files being created in the "www" folder, including the httpd.conf file. Open the file and add your website settings at the end of it:
Listen 8001
<VirtualHost *:8001>
DocumentRoot /usr/local/apache2/htdocs/<YOUR_WEBSITE_FOLDER>/
ServerName <WEBSITE_DOMAIN>
</VirtualHost>
Replace "<YOUR_WEBSITE_FOLDER>" with the name of the folder containing your website files. If you don't have a domain, you can leave it as "localhost".
Make sure the port matches the one you set in Docker Compose.
For example, if you created the folder structure as follows:
.
└── www
├── my_website
| └── index.html
├── httpd.conf
└── docker-compose.yml
You should replace "<YOUR_WEBSITE_FOLDER>" with "my_website".
After making the changes to httpd.conf, restart Apache Docker:
sudo docker-compose restart
If everything is correct, you will be able to access your site on the port you have configured.
To add more sites, simply add more VirtualHost settings in httpd.conf, along with the respective site folders and port settings in Docker Compose.
This way, you can host as many sites as you like on your server.
Listen 8001
<VirtualHost *:8001>
DocumentRoot /usr/local/apache2/htdocs/website1/
ServerName <DOMAIN_1>
</VirtualHost>
Listen 8002
<VirtualHost *:8002>
DocumentRoot /usr/local/apache2/htdocs/website2/
ServerName <DOMAIN_2>
</VirtualHost>
[4] Exposing the server to the internet.
Now that you have a web server up and running, it would be interesting to be able to make your site available for other people to access or even add a domain to it.
However, many people have difficulties with this process, as a home server generally doesn't have a static public IP and also has no protection against DDoS attacks.
To solve this, we're going to use Cloudflare Tunnel, part of Cloudflare.
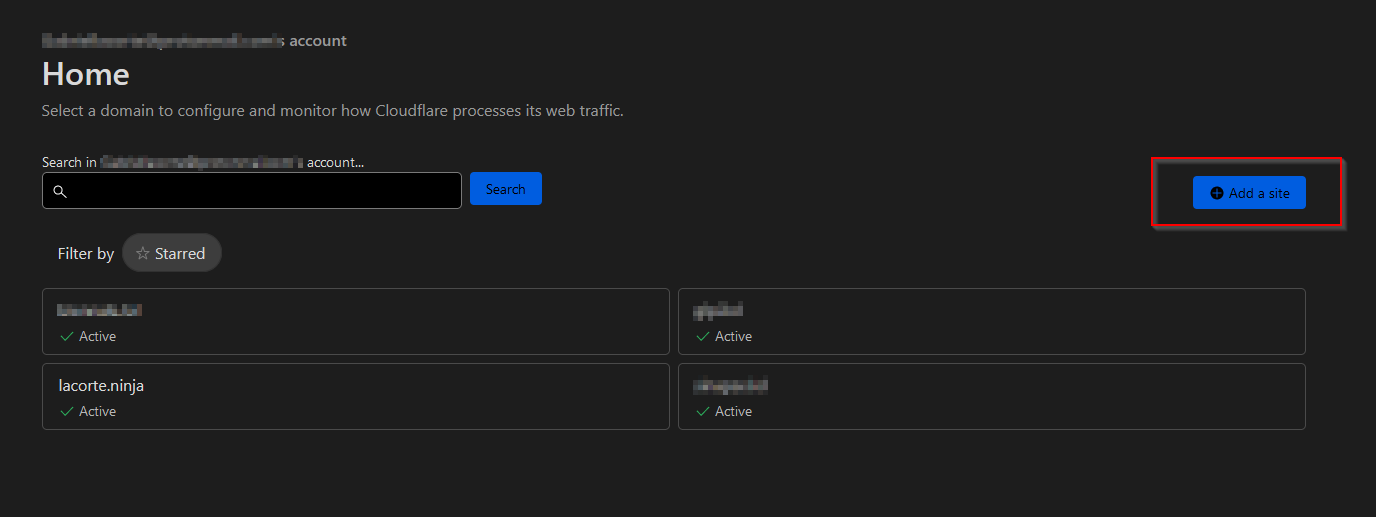
First, create a Cloudflare account, it's a simple and straightforward process. Then add your domain to your account following the instructions provided.
After a few hours, your site will be visible on Cloudflare.
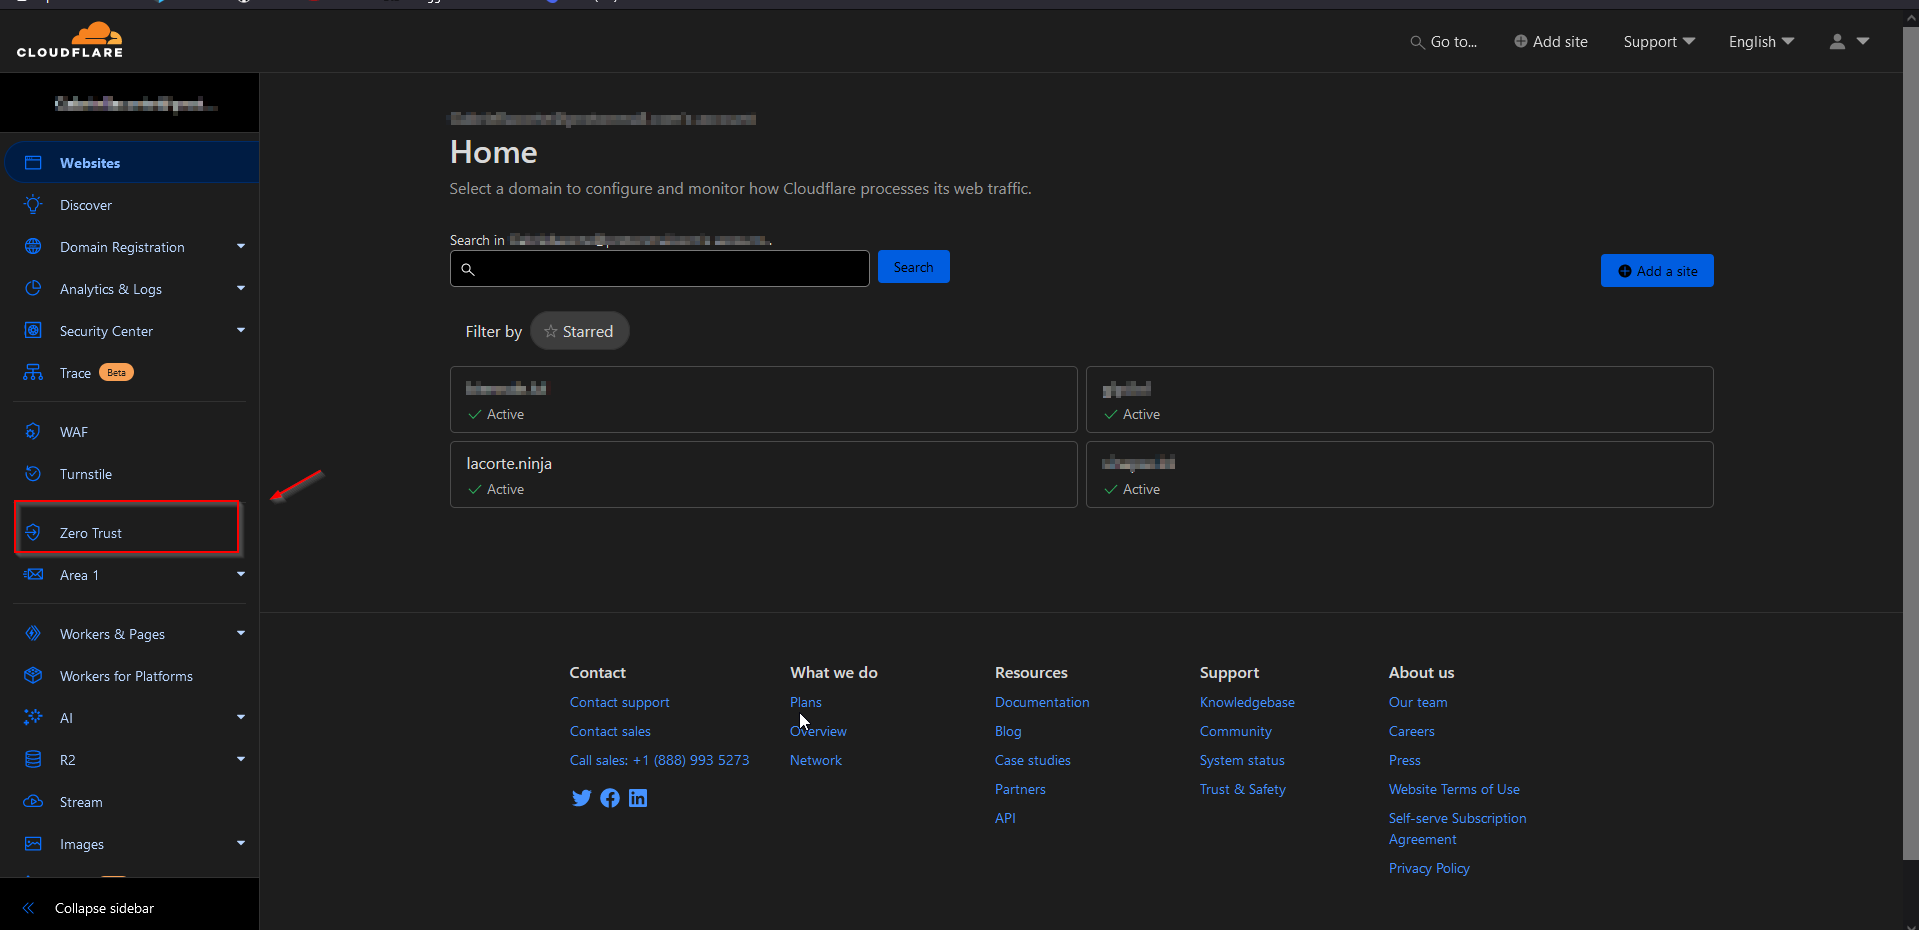
 Now go to the Zero Trust area of Cloudflare to find the option to configure the tunnel.
 You may probably be asked to add a credit card, but rest assured, you won't be charged anything, their free plan is very good and more than enough.
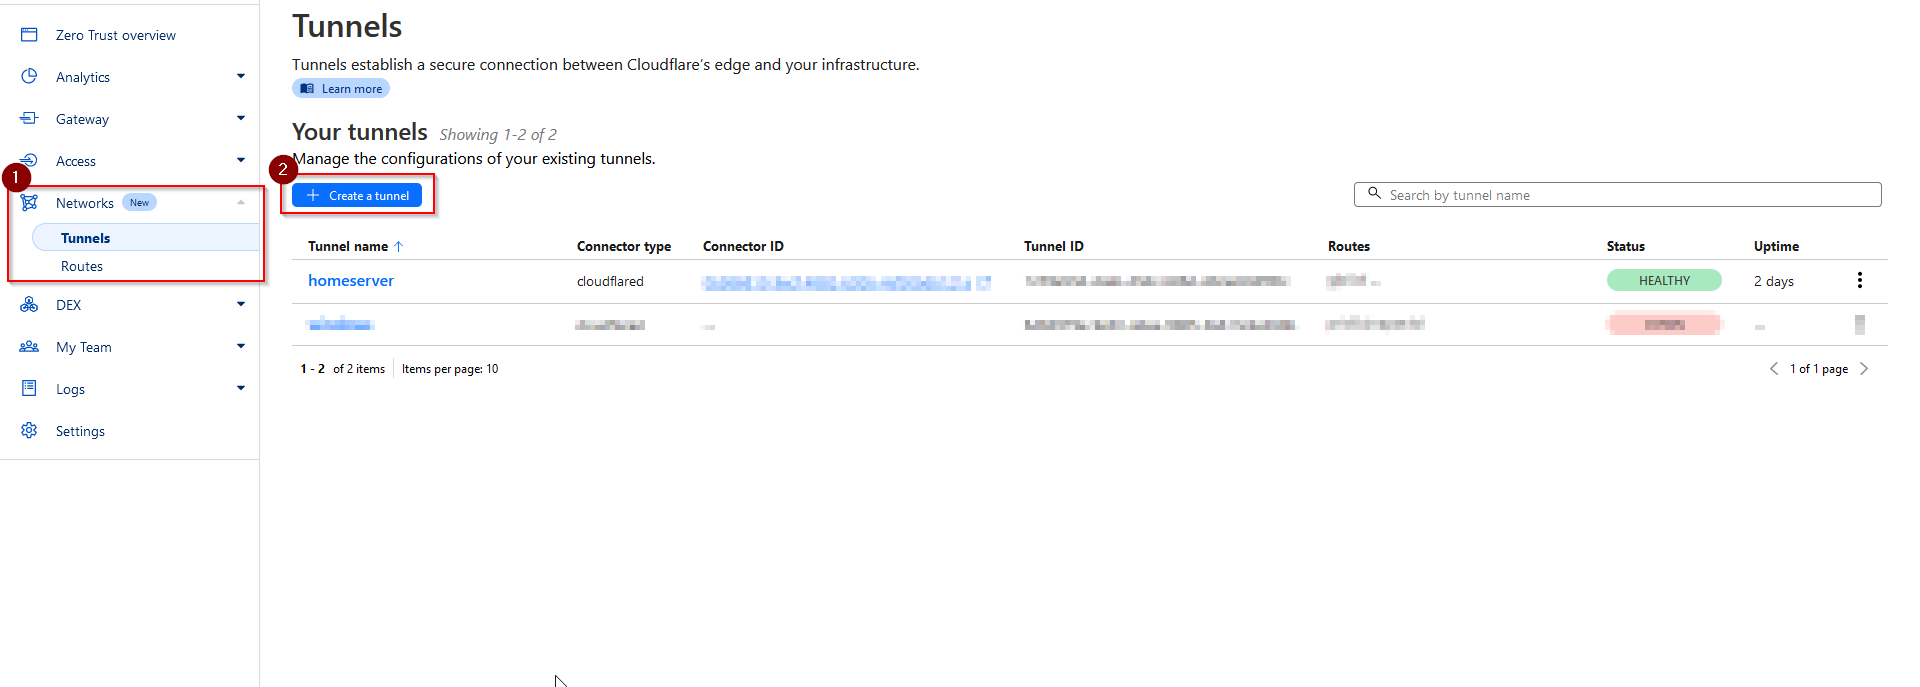
On the Zero Trust platform. Click on "Networks" and then "Tunnels". Here you have to create your first tunnel.
You may probably be asked to add a credit card, but rest assured, you won't be charged anything, their free plan is very good and more than enough.
On the Zero Trust platform. Click on "Networks" and then "Tunnels". Here you have to create your first tunnel.
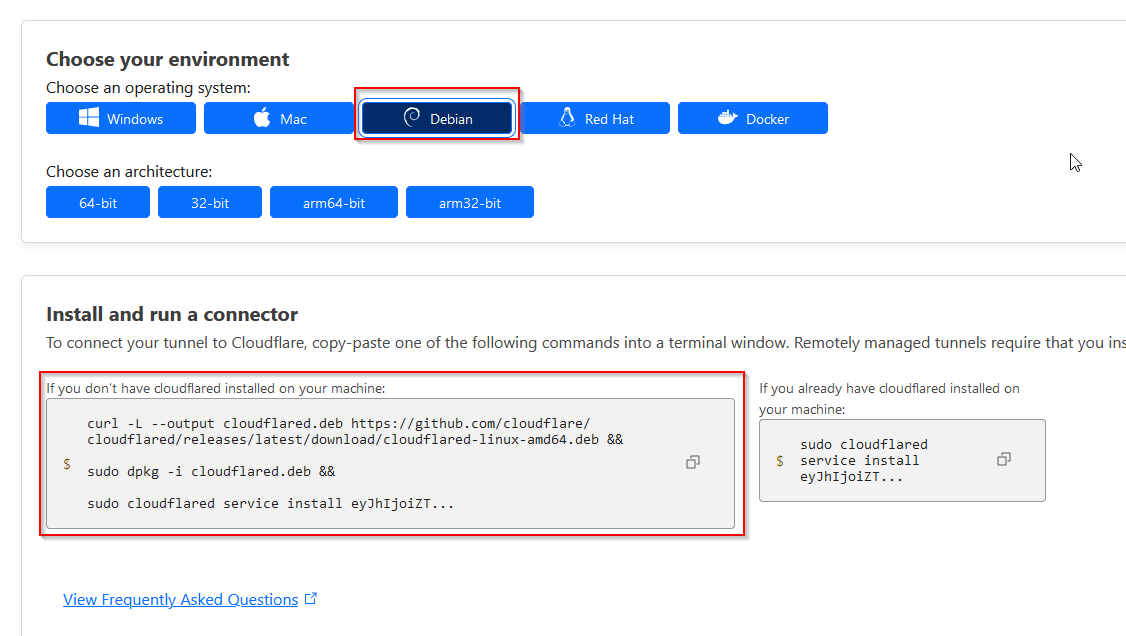
 Select the tunnel type as Cloudflared and give the tunnel a name (e.g. "Home server"). Click on save. Then run the command that will appear for your operating system (Debian),
to install Cloudflared and connect your tunnel. It should be something like:
Select the tunnel type as Cloudflared and give the tunnel a name (e.g. "Home server"). Click on save. Then run the command that will appear for your operating system (Debian),
to install Cloudflared and connect your tunnel. It should be something like:
curl -L --output cloudflared.deb https://github.com/cloudflare/cloudflared/releases/latest/download/cloudflared-linux-amd64.deb &&
sudo dpkg -i cloudflared.deb &&
sudo cloudflared service install <TOKEN>
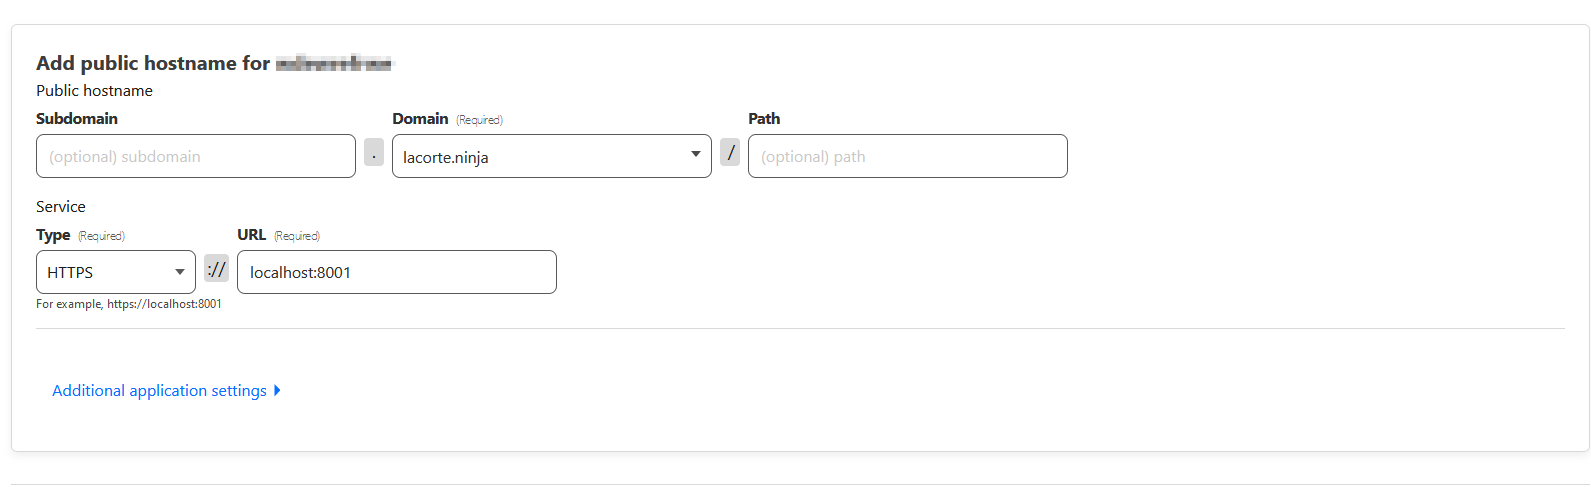
 After connecting your machine, click on "Next" and start configuring your tunnel. Choose the domain where your site will be, the path or subdomain if you like, and your server port.
For a simple site, select HTTP and fill in the necessary information.
After connecting your machine, click on "Next" and start configuring your tunnel. Choose the domain where your site will be, the path or subdomain if you like, and your server port.
For a simple site, select HTTP and fill in the necessary information.
 You can add as many tunnels as you like, for as many sites and ports as you need. Cloudflared is a great tool for this!
[5] Some applications to install.
Now that you've learned almost everything, let's install some useful and cool applications on your server. Here are some suggestions for applications that you can host on your own server.
1. Password manager: Vaultwarden
A password manager is an essential tool for keeping your passwords safe. Hosting your own password manager, such as VaultWarden (a modified version of BitWarden),
is a safe and reliable option. First, create a folder called "vault" in your home and add the following docker-compose.yml:
You can add as many tunnels as you like, for as many sites and ports as you need. Cloudflared is a great tool for this!
[5] Some applications to install.
Now that you've learned almost everything, let's install some useful and cool applications on your server. Here are some suggestions for applications that you can host on your own server.
1. Password manager: Vaultwarden
A password manager is an essential tool for keeping your passwords safe. Hosting your own password manager, such as VaultWarden (a modified version of BitWarden),
is a safe and reliable option. First, create a folder called "vault" in your home and add the following docker-compose.yml:
version: '3'
services:
vaultwarden:
container_name: vaultwarden
image: vaultwarden/server:latest
restart: unless-stopped
volumes:
- /home/<your_user>/vault/data/:/data/
ports:
- 8002:80
Change the path on the volume to your desired folder and the port as necessary.
Then run the command below to start docker:
sudo docker-compose up -d
You can access your password manager at http://localhost:8002 To create an account, make sure you use the site with SSL,
which can be done using Cloudflared to add it automatically, or consult the VaultWarden documentation on how to add an SSL certificate.
Once you have created your account, you can easily manage your passwords.
2. Search Engine: SearxNG
Having a secure, private search engine that you host yourself is an excellent addition to your home server. You can use SearxNG for this.
Create a folder in your home called "searxng" and add the following docker-compose.yml:
version: '3'
services:
searxng:
image: searxng/searxng:latest
container_name: searxng
environment:
- SEARXNG_BASE_URL=https://example.com
cap_drop:
- ALL
cap_add:
- CHOWN
- SETGID
- SETUID
- DAC_OVERRIDE
volumes:
- /home/<your_user>/searxng:/etc/searxng
ports:
- 8003:8080
restart: unless-stopped
Change the volume path to your desired folder, the port and your domain as required.
Then start the container with the command:
sudo docker-compose up -d
You can now access your search engine at http://localhost:8003. To customize it further, you can edit the settings.yml file inside the "searxng" folder.
If you'd like to try it out, I host a SearxNG demo at http://search.lacorte.ninja.
That was the guide to setting up your home server. There's still a lot to learn, so I'll leave you with this list of resources that were very useful to me when I first set up my home server:
If you have any questions or would like to include anything else in this guide, please contact me via my contact page at
https://lacorte.ninja/en/contact.html.